What are Email Triggers?
Email triggers turn your workflows into email-based automation services. When you set up an email trigger, Pinkfish generates a unique email address for your workflow. Any email sent to that address will automatically start your workflow, with the email content, attachments, and sender information passed as inputs. This enables you to create email-driven automations like:- Report Generation Services: Email a request and get back formatted reports
- Document Processing: Send files via email for automated analysis or conversion
- Customer Support Automation: Route and process support requests automatically
- Data Collection: Gather information through structured email submissions
Setting Up an Email Trigger
1. Access the Trigger Menu
From your workflow editor, navigate to the triggers section and select “New Email Trigger.”2. Configure Your Email Trigger
When creating an email trigger, you’ll see several configuration options: Name: Give your trigger a descriptive name for easy identification (e.g., “Email 1”, “Report Generator”, etc.) Access Control: Choose who can trigger your workflow via email:- Anyone can send an email to trigger this automation: Open access - any email address can trigger your workflow
- Only approved senders send an email to trigger this automation: Restricted access - only pre-approved email addresses can trigger your workflow
- Individual Email Addresses: Add specific email addresses that are allowed to trigger the workflow
- Approved Domains: Allow entire domains (e.g., @yourcompany.com) to trigger the workflow
- Latest: Always runs the most recent published version (recommended)
- Specific Version: Lock the trigger to a particular workflow version
3. Save and Get Your Email Address
After clicking “Save,” Pinkfish will generate a unique email address for your workflow. This address will look something like:How Email Triggers Work
Email Input Structure
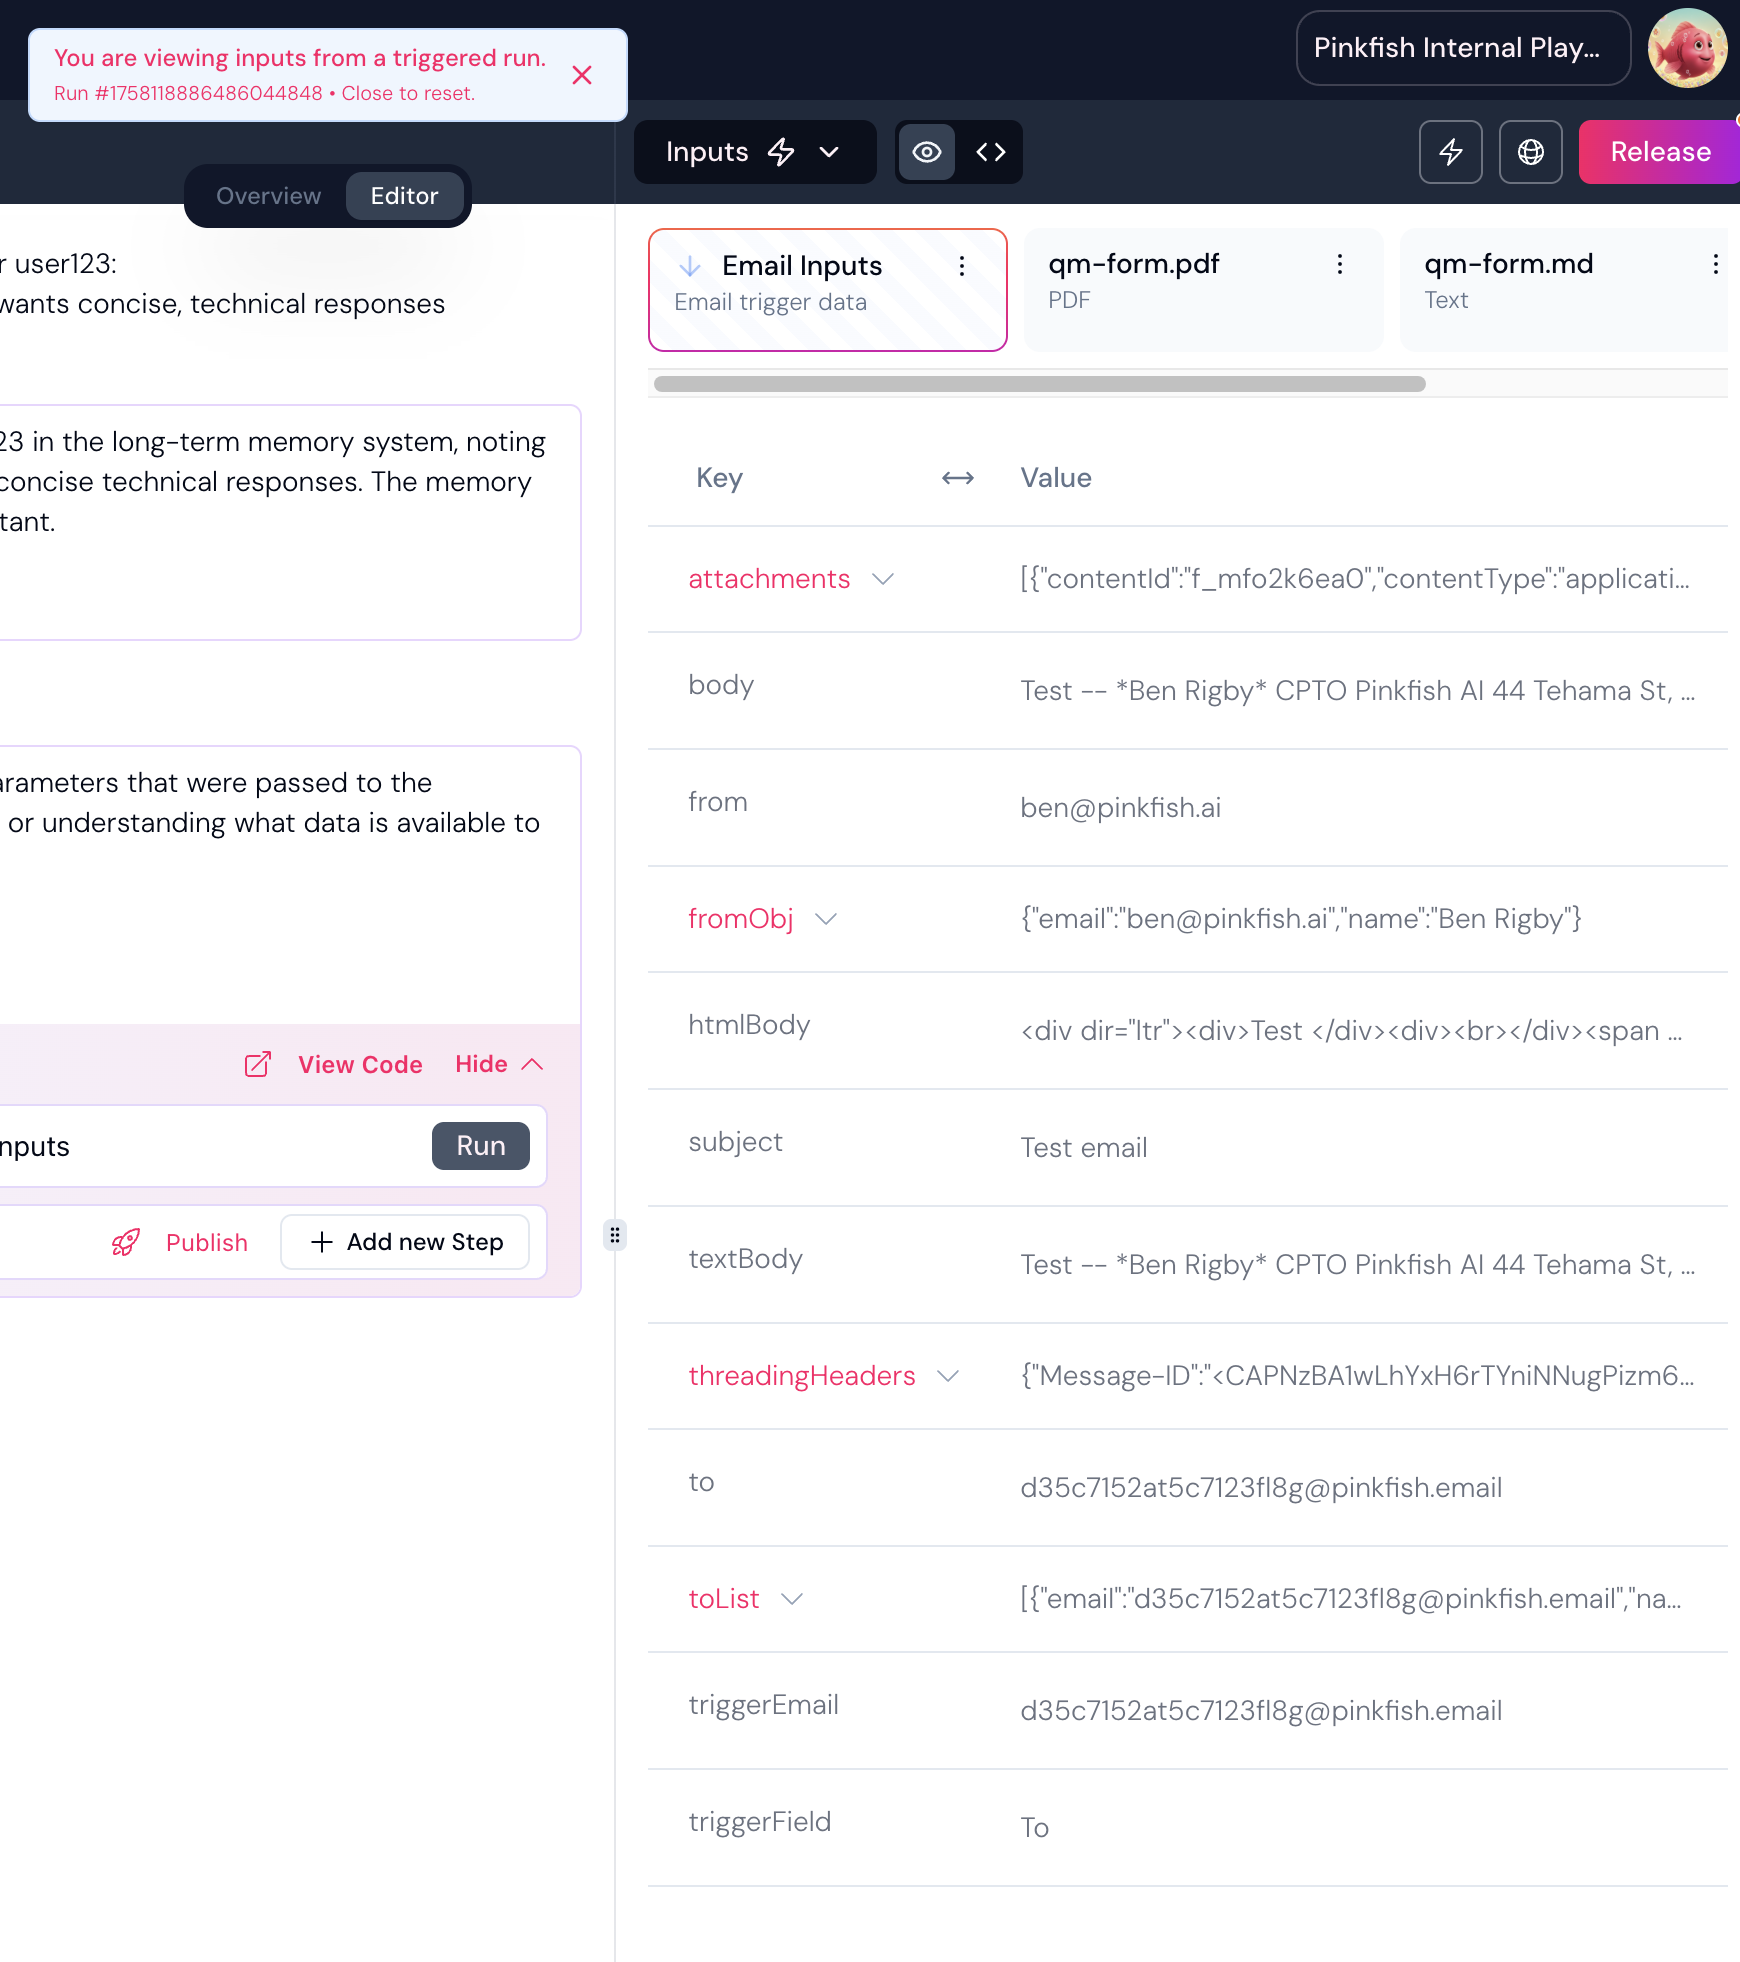
When an email triggers your workflow, the following data is automatically passed as inputs:body: The plain text body of the emailhtmlBody: The HTML body of the email (if available)subject: The email subject linefrom: The sender’s email addressfromObj: Detailed sender information including name and emailto: The trigger email address that received the messagetoList: List of all recipients (useful for CC/BCC scenarios)attachments: Array of file attachments with metadatathreadingHeaders: Email threading information for conversation trackingtriggerEmail: The specific trigger email address usedtriggerField: Additional trigger metadata
Attachment Handling
Email attachments are automatically processed and made available to your workflow:- File Content: Attachments are stored and accessible via secure URLs
- Metadata: Each attachment includes filename, content type, size, and other properties
- Multiple Formats: Support for documents, images, PDFs, and other file types
Note: To access attachments in your workflows, use a prompt like “Get email attachments” which will download your attachments to that step for use in your workflow.
Monitoring Email Triggers
Workflow Monitor
Track all email-triggered workflow runs in the Orchestration → Workflow Monitor:- Navigate to the Workflow Monitor from the main navigation
- Filter by your specific workflow to see email-triggered runs
- View run status, duration, and results
- Access detailed logs and execution information
Viewing Email Inputs
To inspect the data sent via email trigger:- In the Workflow Editor: Click the lightning bolt (⚡) icon on the right side of the interface
- Select “Triggered Runs”: This shows runs initiated by triggers (not manual runs)
- Choose a Run: Select the specific email-triggered run you want to examine
- View Inputs: Click “View Inputs” to see all the email data including:
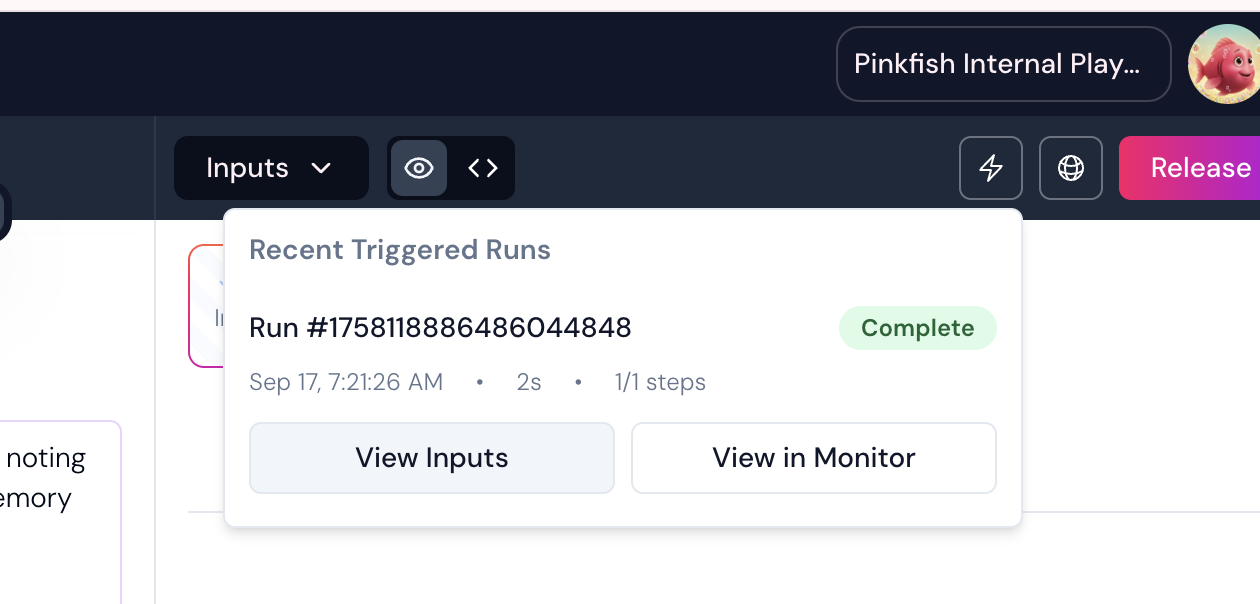
- Email body and subject - Sender information - Attachments and their metadata - All other email-related fields
- Debugging: Understanding what data your workflow receives
- Development: Testing different email formats and attachments
- Optimization: Refining how your workflow processes email inputs
Responding to Email Triggers
Inbound vs. Outbound Email Processing
Email triggers handle inbound email processing—receiving and parsing emails to start workflows. Outbound email responses are a separate process that gives you flexibility in how you reply to trigger emails.Outbound Email Options
When your workflow needs to send email responses, you have several options:1. Your Own Email Service
Connect your existing email infrastructure for branded responses:- SendGrid, Mailgun, etc.: Use API connections to send through your transactional email service
- Gmail Connector: Send through your Gmail account with full email management capabilities
- Microsoft Outlook Connector: Send through your Outlook/Office 365 account with integrated calendar and task features
- Custom SMTP: Connect any SMTP service through custom integrations
2. Pinkfish Email Outbound Service
Use our built-in email service for quick prototyping and simple use cases:- No setup required—perfect for prototyping
- Built-in rate limiting and delivery management
- Automatic HTML/plain text formatting
See the complete Email Outbound Guide for detailed usage, parameters, and examples.
3. Responding to Trigger Senders
Extract the sender information from the email trigger to respond directly:Branded Email Experience Setup
Professional Email Forwarding
Many organizations set up a professional forwarding system for a fully branded experience:- Create a branded email address (e.g.,
support@yourcompany.com) - Set up email forwarding from your branded address to the Pinkfish trigger email
- Configure outbound responses to send from your branded domain using your email service
- Result: Customers email
support@yourcompany.comand receive responses from the same branded address
- Inbound:
support@yourcompany.com→ forwards to →d35c7152at5c7123f18g@pinkfish.email - Outbound: Workflow uses Gmail/Outlook connector to respond from
support@yourcompany.com - Customer Experience: Seamless interaction with your branded email address
Benefits of Forwarding Setup:
- Professional appearance: All communication appears to come from your domain
- Brand consistency: Maintains your organization’s email branding
- Deliverability: Responses come from your established email reputation
- Flexibility: Easy to change automation without updating external references
Email Threading and Conversations
Maintain email conversation threads by:- Using the
threadingHeadersfrom the trigger input - Including proper
In-Reply-ToandReferencesheaders in responses - Matching subject line patterns (e.g., “Re: Original Subject”)
Best Practices
Security Considerations
- Use Approved Senders: For sensitive workflows, always restrict access to approved senders or domains
- Validate Input: Always validate and sanitize email content in your workflow
- Monitor Usage: Regularly check your workflow monitor for unexpected activity
Email Response Best Practices
- Use branded outbound: Set up forwarding and branded responses for professional communications
- Prototype with Pinkfish outbound: Use
/email-outboundfor testing and simple automations - Maintain conversation threading: Preserve email thread context for better user experience
- Handle attachments properly: Process and reference attachments in your responses appropriately