Documentation Index
Fetch the complete documentation index at: https://docs.pinkfish.ai/llms.txt
Use this file to discover all available pages before exploring further.
What can you do with it?
Execute SQL queries and manage data warehousing operations in Snowflake, including submitting statements for execution, monitoring their status, and canceling long-running queries when needed.How to use it?
Basic Command Structure
Parameters
Required:action- The operation to perform (execute, check-status, cancel)
timeout- Query timeout in seconds (default: 60)statement-handle- Handle for status checking or cancellation
Tools
Execute SQL Statement
Submit a SQL statement for execution in Snowflake Parameters:statement(required) - The SQL statement to executetimeout(optional) - Query timeout in seconds
Check Statement Status
Retrieve the status of a previously submitted SQL statement Parameters:statement-handle(required) - The handle of the statement to check
Cancel Statement Execution
Cancel the execution of a running SQL statement Parameters:statement-handle(required) - The handle of the statement to cancel
Notes
Snowflake supports standard SQL syntax and provides detailed metadata about query results including row types, column names, and data types.Custom Connection using OAuth
Pinkfish provides a built-in Snowflake connector that uses private key authentication for secure connections. However, if you prefer OAuth2 authentication over private keys, or if your organization’s security policies require OAuth2 flows, you can create a custom OAuth2 connection instead. This guide walks you through setting up OAuth2 authentication for Snowflake integration as an alternative to the default private key method.OAuth vs Private Key Authentication
Built-in Private Key Method:- Uses RSA key pairs for authentication
- No user interaction required after setup
- Ideal for automated workflows and service accounts
- Uses OAuth2 authorization flows
- Requires initial user consent during setup, then automated via refresh tokens
- Better integration with identity providers and user-based access controls
- Allows for more granular permission scopes
Prerequisites
- Account admin role in Snowflake
- Access to Snowflake SQL interface
Step 1: Create OAuth2 Client Application
Create a new OAuth2 security integration with the following SQL command:Step 2: Get Authorization and Token URLs
Retrieve the OAuth endpoints by describing the security integration:Step 3: Get Client ID and Secret
Extract the client credentials using the system function:Step 4: Configure OAuth Application
4a. Configure OAuth Flow Settings
Using the URLs from Step 2, fill in the OAuth 2.0 Setup form: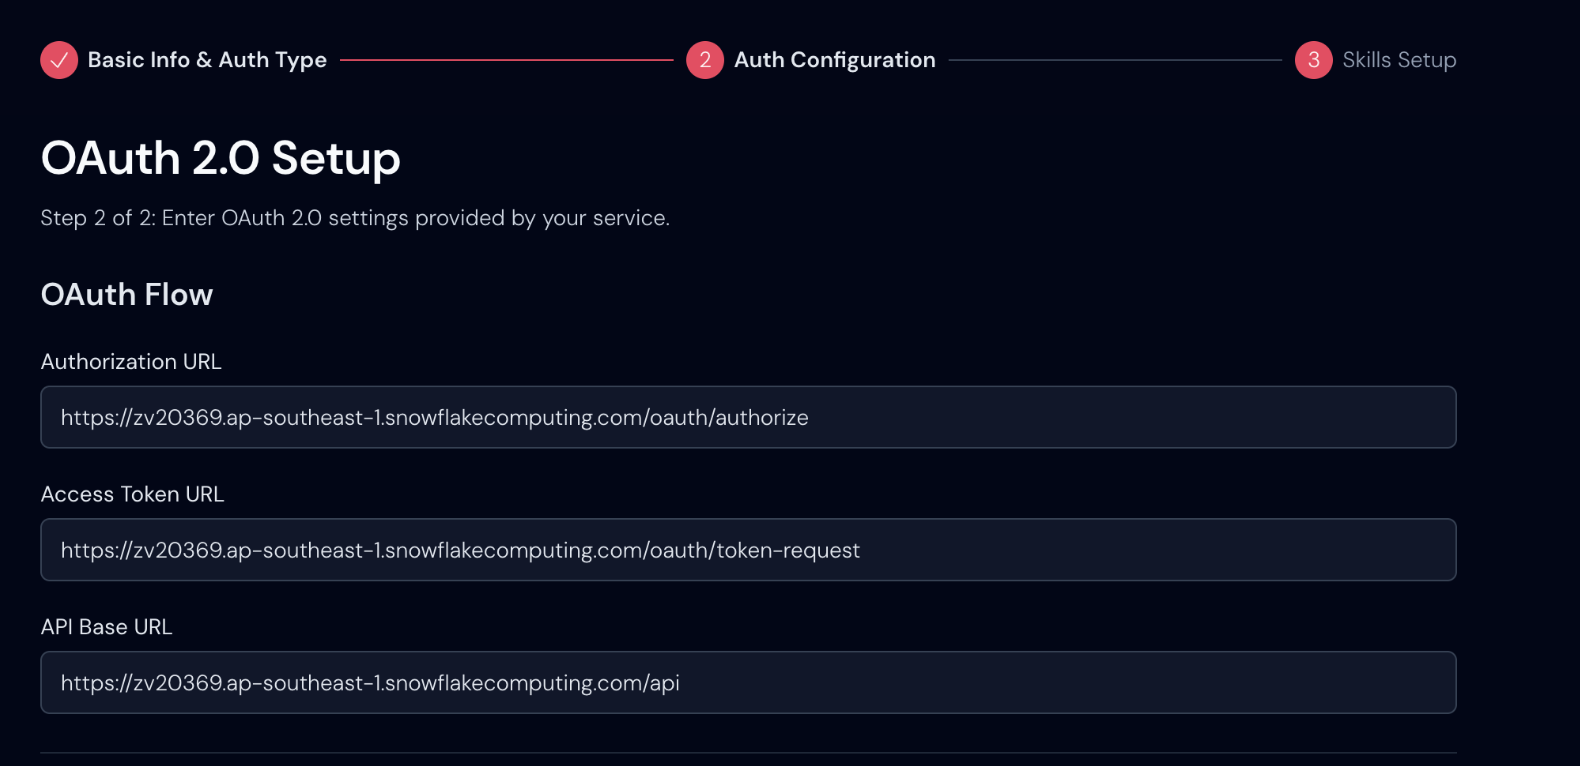
zv20369.ap-southeast-1 with your actual Snowflake account identifier from Step 2.
4b. Configure OAuth App Details
Using the credentials from Step 3, fill in the OAuth App Details form: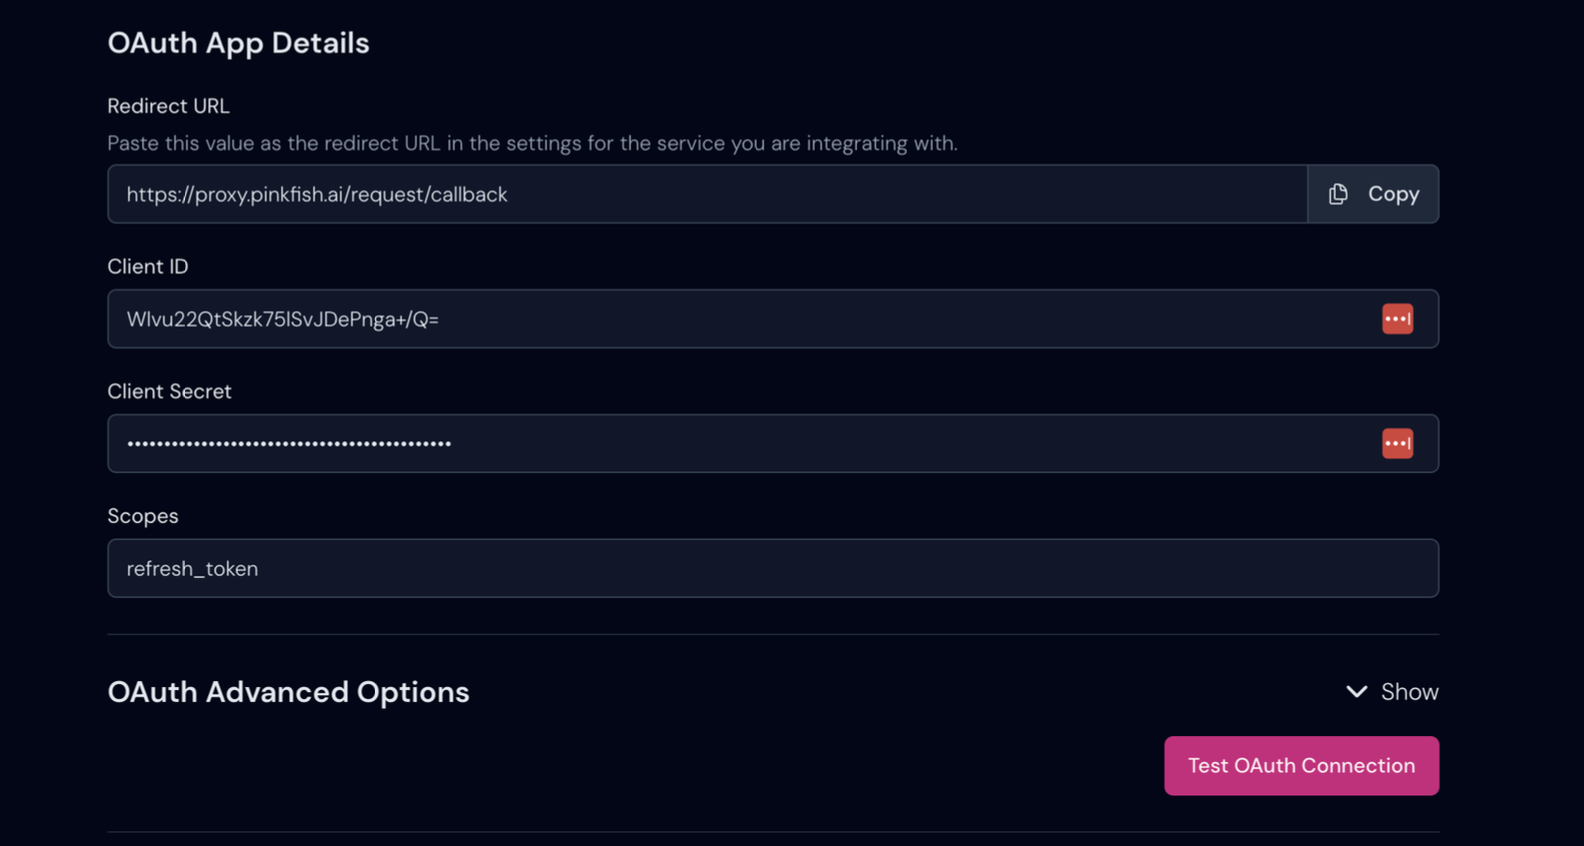
refresh_token
Required Values Summary
From the setup process, you’ll need:- OAUTH_CLIENT_ID (from Step 3)
- OAUTH_CLIENT_SECRET (from Step 3)
- Authorization and Token endpoints (from Step 2)
Additional Notes
- A good test endppint is:
/v2/users - Refresh tokens are valid for 90 days (7,776,000 seconds)
- The redirect URI is set to
https://proxy.pinkfish.ai/request/callback - Client type is set to ‘CONFIDENTIAL’ for enhanced security
- Replace account identifiers in URLs with your actual Snowflake account details
- Important: Only users who are members of your Snowflake account can authenticate through this OAuth2 integration. Note that the account admin who creates the OAuth2 client application cannot use it to authenticate themselves - you’ll need a different user account to test the connection