> ## Documentation Index
> Fetch the complete documentation index at: https://docs.pinkfish.ai/llms.txt
> Use this file to discover all available pages before exploring further.
# Triggers
> Every way an Agent Mode workflow can start — manual, API, schedule, email, and third-party app events.
A **trigger** is the entry point of your workflow. Each workflow has at least one — the built-in Manual trigger — and you can add more to make the workflow react to events: an HTTP request, a cron schedule, an inbound email, or an event in a connected app like Slack or Gmail.
## Trigger types
Run manually from the builder.
Start via an HTTP endpoint.
Run on a schedule.
Start when an email is received.
Start from an external app event (Slack, Gmail, GitHub, etc.).
Start from a user-facing form. See [Interface](/agentic-editor/interface).
### Manual Trigger
The simplest trigger — always present on every workflow and cannot be deleted. Fires when you click **Run Workflow** in the editor header or when you call the workflow programmatically without a specific trigger. Useful for authoring and testing.
### API Trigger
Exposes the workflow as an HTTP endpoint. Each API trigger has two URLs:
* **Draft URL** — hits the current draft of the workflow. Useful while iterating.
* **Live URL** — hits the most recent [release](/agentic-editor/releases) of the workflow.
Settings include:
* **Authentication** — an auth header Pinkfish auto-provisions for the trigger.
* **Input schema** — declare the expected request body shape so the coding agent (and downstream nodes) know what fields to expect.
Pinkfish provides a helper to test an API trigger without leaving the editor — click **Call API trigger** in the run area to open a modal that generates a sample `curl` command with your auth token and a pretty-printed JSON body editor.
For programmatic invocation details, see [Triggers API](/api-reference/introduction).
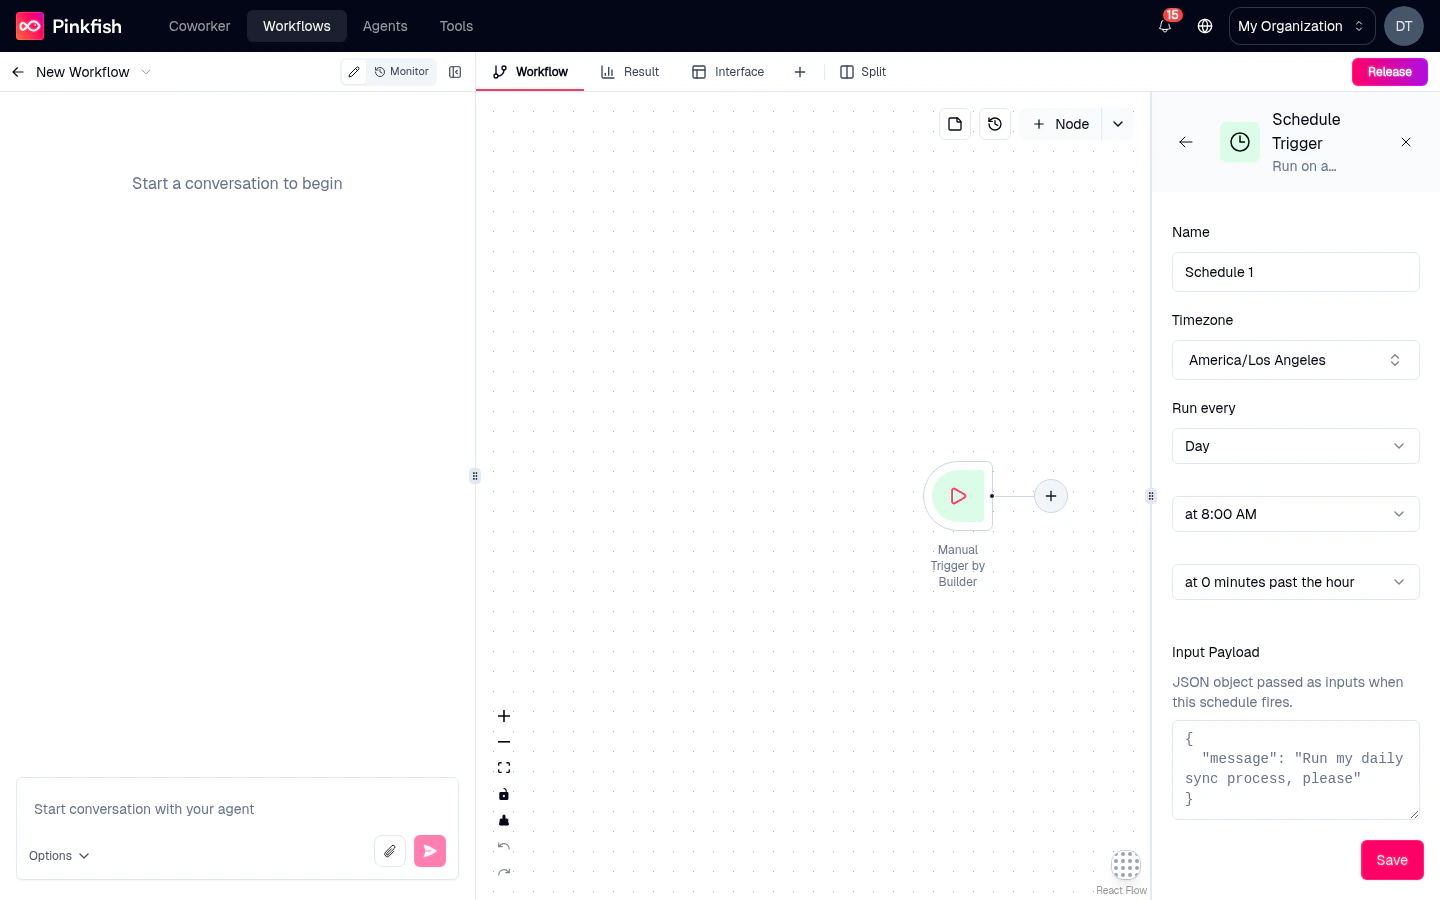
### Schedule Trigger
Runs the workflow on a cron schedule. Configure with:
* **Cron expression** — an AWS EventBridge 6-field cron (`minute hour day-of-month month day-of-week year`). Exactly one of day-of-month / day-of-week must be `?` — e.g. `0 9 * * ? *` (9 AM daily) or `0 0 ? * 2 *` (Mondays at midnight). Expressions that AWS would reject (such as `0 * * * * *`, with `*` in both day fields) are refused when you save.
* **Timezone** — the timezone the cron runs in.
* A **next-run preview** that shows when the trigger will fire next, in a human-readable form ("Tomorrow at 08:00 UTC").
 ### Email Trigger
Gives the workflow an inbound email address — `trigger-@pinkfish.email` — and fires whenever a message arrives at that address. The email body, subject, sender, and attachments are exposed as inputs to downstream nodes.
### Integration App Trigger
Start the workflow from an event inside a connected app. Pick the app (Slack, Gmail, GitHub, HubSpot, Linear, Notion, and many more), then pick the event (`New Email`, `New Slack Message`, `Issue Created`, etc.). Pinkfish subscribes to the app's webhook or polls its API and fires your workflow when the event occurs.
Authentication flows through your existing [connections](/tools/connections). If the app isn't connected yet, the trigger editor walks you through adding the connection inline.
### Event Trigger
For internal Pinkfish events — another workflow completing, a data collection updating, a specific agent finishing a run. See [Event triggers](/triggers/event-triggers) for the full reference.
## Trigger input schema
Every trigger can declare an **input schema** — a JSON-schema-like definition of the data shape the workflow expects to receive. Inputs appear as named fields the coding agent and downstream nodes can reference (`{{trigger.customerName}}`), and they're validated before the workflow runs.
Click **Edit input schema** on any trigger settings panel to open the schema editor. Fields support types: `string`, `number`, `boolean`, `object`, `array`, `file`, `enum`, `date`, and more.
Declaring an input schema makes your workflow much easier for others to call correctly — both via API and via the in-editor Run button.
## Draft vs live triggers
Agentic workflows maintain separate **draft** and **live** versions of each trigger. Iterating on the draft doesn't affect production callers; when you release the workflow, the live trigger URL starts pointing at the new version.
You'll see a small **Draft** or **Live** badge in the trigger settings panel indicating which version's configuration you're editing.
## Testing a trigger
* **Manual** — click **Run Workflow** in the header.
* **API** — open **Call API trigger** and send the generated curl.
* **Schedule** — click **Run now** (fires as if the scheduled time had arrived).
* **Email** — send a real email to the trigger's address.
* **App trigger** — perform the event in the source app (post a message, open an issue).
See [Running a Workflow](/agentic-editor/running) for the full run flow.
## Adding a trigger
Open the **Add Node** panel, switch to the **Triggers** tab, and pick a trigger type. The trigger node appears on the canvas at the left edge and its settings panel opens automatically so you can configure it immediately.
App triggers require a live connection to the source app. If the connection expires or is revoked, the trigger shows an **Inactive connection** badge in the editor and pauses firing. Re-authenticate from [Connections](/tools/connections).
## What's next
Test your trigger with real or simulated invocations.
Configure the user-facing form that the Interface trigger serves.
Pinkfish's internal event system.
Program against trigger endpoints from outside Pinkfish.
### Email Trigger
Gives the workflow an inbound email address — `trigger-@pinkfish.email` — and fires whenever a message arrives at that address. The email body, subject, sender, and attachments are exposed as inputs to downstream nodes.
### Integration App Trigger
Start the workflow from an event inside a connected app. Pick the app (Slack, Gmail, GitHub, HubSpot, Linear, Notion, and many more), then pick the event (`New Email`, `New Slack Message`, `Issue Created`, etc.). Pinkfish subscribes to the app's webhook or polls its API and fires your workflow when the event occurs.
Authentication flows through your existing [connections](/tools/connections). If the app isn't connected yet, the trigger editor walks you through adding the connection inline.
### Event Trigger
For internal Pinkfish events — another workflow completing, a data collection updating, a specific agent finishing a run. See [Event triggers](/triggers/event-triggers) for the full reference.
## Trigger input schema
Every trigger can declare an **input schema** — a JSON-schema-like definition of the data shape the workflow expects to receive. Inputs appear as named fields the coding agent and downstream nodes can reference (`{{trigger.customerName}}`), and they're validated before the workflow runs.
Click **Edit input schema** on any trigger settings panel to open the schema editor. Fields support types: `string`, `number`, `boolean`, `object`, `array`, `file`, `enum`, `date`, and more.
Declaring an input schema makes your workflow much easier for others to call correctly — both via API and via the in-editor Run button.
## Draft vs live triggers
Agentic workflows maintain separate **draft** and **live** versions of each trigger. Iterating on the draft doesn't affect production callers; when you release the workflow, the live trigger URL starts pointing at the new version.
You'll see a small **Draft** or **Live** badge in the trigger settings panel indicating which version's configuration you're editing.
## Testing a trigger
* **Manual** — click **Run Workflow** in the header.
* **API** — open **Call API trigger** and send the generated curl.
* **Schedule** — click **Run now** (fires as if the scheduled time had arrived).
* **Email** — send a real email to the trigger's address.
* **App trigger** — perform the event in the source app (post a message, open an issue).
See [Running a Workflow](/agentic-editor/running) for the full run flow.
## Adding a trigger
Open the **Add Node** panel, switch to the **Triggers** tab, and pick a trigger type. The trigger node appears on the canvas at the left edge and its settings panel opens automatically so you can configure it immediately.
App triggers require a live connection to the source app. If the connection expires or is revoked, the trigger shows an **Inactive connection** badge in the editor and pauses firing. Re-authenticate from [Connections](/tools/connections).
## What's next
Test your trigger with real or simulated invocations.
Configure the user-facing form that the Interface trigger serves.
Pinkfish's internal event system.
Program against trigger endpoints from outside Pinkfish.